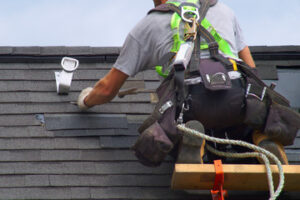
Roofing is tough work. It involves a lot of climbing and carrying heavy bundles of shingles up and down the ladder. It is important to have sturdy shoes and a well-suited ladder for the job.
Your roof is a bulwark against the elements, and it can also add to your home’s value. However, it requires more than just a sturdy frame and weather-resistant materials; aesthetic compatibility with your architectural style and budget are essential, as are durability, maintenance requirements, and energy efficiency.
A roofing installation project begins with the sheathing, or wood foundation layer. This is typically plywood or OSB and provides a stable base for your roofing material. Some roofers use metal sheathing to cover flat or low-slope roofs, which can be installed over existing shingles without tearing off the old ones.
If your new roof will be shingle-based, a top-tier roofer will install the sheathing then lay the shingles with care. They can be nailed to the sheathing or screwed in. Either way, a quality roofer will make sure each shingle is securely in place to protect your house from the elements for years to come.
Rolled roofing is another popular option for sloped residential roofs and outbuildings like sheds. It consists of large rolls of asphalt-impregnated and mineral-granule-topped material, and it’s usually installed with either a torch or roofing nails. It doesn’t offer much in the way of visual appeal, but it’s affordable and easy to install.
Wood shingles and shakes are attractive and durable, and they’re available in a variety of colors. But they’re a poor choice in areas prone to high moisture and wildfires, and they require a substantial maintenance investment. If you opt for wood shingles, look for ones made from cedar or Alaskan yellow cedar, which are dimensionally-stable and naturally resistant to rot and insect damage.
Slope
When installing a roof or re-roofing an existing home, it’s important to know the slope of the roof in order to properly plan for roofing materials. A roof slope is most commonly measured using a spirit level and a tape measure. Having this knowledge upfront can help ensure that the right amount of materials is used and prevent future problems from an under- or over-estimating.
A roof slope is defined as how much a roof rises vertically for every 12 inches of horizontal run. For example, a roof that rises 4 inches for every 12 inches of run would have a slope of 4:12 (also sometimes written as 6/12). It’s important to note that there is a difference between the terms slope and pitch; while most people use the words interchangeably, carpenters are more likely to refer to the measurement as “pitch.”
Measuring a roof’s slope can be done safely from the ground with the proper tools. Begin by measuring 12 inches on your level and making a mark at that point. Rest the level against a support beam or other surface that’s flat, such as the bottom of the roof truss, and measure up from that mark to the roof. This will give you your roof’s run measurement. You can then determine the slope of your roof by dividing the run measurement by the height of the level’s bubble.
While some may be intimidated by the math involved in calculating the slope of a roof, this method is actually fairly straightforward and can be easily used by homeowners or even by novice carpenters. While it may take a little more time and patience than simply taking a reading from a slanted ridge, the results are much more accurate.
Underlayment
Underlayment is any material used as a base on which shingles, siding or other finishing materials are installed. It is important because it helps to ensure a strong bond between the finished product and the home’s structure. This is critical for long-term performance and the duration of any warranty protection. There are a number of different types of underlayment, but the most common is a felt paper or a synthetic membrane. Some roofers prefer to use rubberized asphalt underlayment, which contains a high percentage of rubber and asphalt polymers that work to make the material extra waterproof. It comes in rolled sheets and is often self-adhesive, making it easy for contractors to install.
Before the underlayment goes down, contractors will install a metal drip edge along the eaves and rakes of the roof. This is designed to prevent water from running under the shingles and seeping into the roof decking. If this is not done, the wood could rot and allow ice and rain to penetrate the structure of the home.
Once the drip edge is in place, contractors will cover the roof with a layer of No. 15 asphalt-saturated felt (some codes require No. 30). The felt keeps the roof sheathing dry before shingles go on, protects against wind-driven rain as shingles fail and provides a fire resistance barrier.
Roofing contractors will then install a starter strip, which is half as wide as regular shingles and runs across the first course of shingles. This is designed to create a seal to prevent leakage as the first row of shingles fails and to provide a surface for the shingle sealant to adhere to. Contractors will then nail the start strip to the underlayment at the eaves and rakes, using an overlapping and nailing pattern. They will also nail a drip edge over the starting strip on the sides of the roof to prevent water penetration into the house.
Shingles
The shingles on a roof are coated with colored granules that enhance the look of the home and protect it from weather elements. Most shingle brands have different granules and coating options, so homeowners can customize the look of their roof. Owens Corning Duration Shingles, for example, come in a variety of colors to complement any home. This brand also offers a limited lifetime warranty, and Consumer Reports has rated them highly for impact resistance from hailstones.
A special heat-activated asphalt sealant keeps shingles together on the roof and prevents moisture leaks. Depending on the shingle manufacturer, some have a reflective coating that helps reflect the sun’s heat and reduce cooling costs. A “release film” is often put on the back of shingles to prevent them from sticking together during transport and storage.
There are several types of asphalt shingles, but the most common is a strip shingle. This is the oldest basic shingle type and has cutouts that create three individual tabs on your roof. Other basic shingles include architectural and laminated shingles. These have two or more layers of shingle material that are laminated together to create the appearance of natural wood shakes or slate tile roofing. They are heavier and thicker than strip shingles, and they offer enhanced protection from roof leaks and weather elements.
IKO Nordic shingles have an impressive limited lifetime warranty and are known for their high performance. They’re designed for a range of weather conditions and can resist black streaks from algae. Atlas Pinnacle Pristine shingles are another popular choice for their design, beauty, and durability. They’re even designed to withstand winds up to 150 mph. Make sure you follow the manufacturer’s application guidelines and warranties if you live in an area with high wind speeds.
Flashing
Flashing is a protective layer that prevents moisture from seeping through wall or roof materials. It’s especially important at joints where different building materials meet, like in valleys and around chimneys, dormers, vent pipes and window openings. Without flashing, water can leak under shingles or other roofing materials and damage insulation, cause rot, mold and mildew and encourage pest infestation. Flashing is typically made from metal and installed over the areas where two different materials meet.
There are several different kinds of flashing, each serving a different purpose. Step flashing is a special kind of roof flashing that consists of multiple pieces of sheet metal bent into L-shaped structures. It lines a joint between two different roofing surfaces and is secured to the base of each L with roofing cement. The tops of the L-shaped flashing are then covered with ridge shingles, creating a durable barrier against rainwater leaks.
Another common type of flashing is valley flashing, which seals the area where two roof slopes meet in a “v” shape. This is one of the most prone areas to roof leaks, so it requires extra protection. Valley flashing is usually hidden under shingles, though it can also be exposed.
Another type of flashing is pipe flashing, which is used to protect the area where a pipe penetrates a roof. This type of flashing resembles a one-piece collar that fits over the top of a pipe and extends down the side of the roof. It’s sometimes made from rubber or silicone to allow for easier expansion and contraction. Other types of flashing include drip edge flashing, which is set along the edges of a roof and directs rainwater to gutters; and counterflashing, which covers existing wall flashings.